Bun Toaster Programming
DK3JCK Generation 1 Toaster
Turning Conveyor On
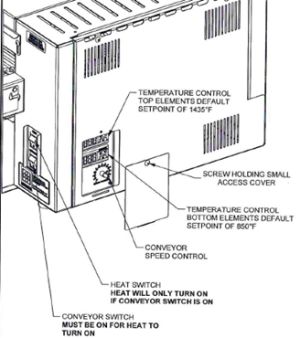
- Press the conveyors switch to on. The conveyor will start moving. The toaster won’t start heating unless the heat switch is turned on.
Turning the Heat On
- Press the heat switch to on. The toaster will start heating. The toaster won’t start heating unless the heat switch is turned on.
Adjusting Conveyor Belt Speed- Area Supervisors ONLY
- Set to a speed of 28 seconds
- Remove the screw holding the small cover on the side. Use the speed control to adjust the conveyor belt speed. The speed control can be adjusted to have a minimum of toast time of 20 seconds and a maximum toast time of 3 minutes 20 seconds.
- After adjusting use stopwatch to time toast time- Adjust as need until it is 28 seconds.
Display the Temperature Set Point
- Remove the screw holding the small cover on the side. Press and release the “Set” button of any of the temperature controls to display the setpoint. Press and release the “Set” button again or wait 10 seconds to exit.
Changing the Temperature Set Point
- Set top to a temperature of 1435° and the bottom to a temperature of 850°
- Remove the screw holding the small cover on the side. Press and hold the “Set” button of the desired temperature control for 3 seconds. The temperature set point value will be displayed. Within 10 seconds, use the up and down arrow buttons to change value. To save the new set point press the “Set” button or wait 10 seconds
Turning Toaster Off
- Turn heat switch off first. Wait 5 minutes to cool down while conveyor is running. After 5 minutes, turn conveyor switch off. All toaster to cool an additional 15 minutes before cleaning.
DK3JCK Generation 2 Toaster
To start, make sure all covers are placed on toaster. Operating toaster without all covers will damage the unit.
Once all covers are on, verify unit is plugged in and turned on.
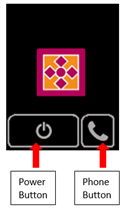
Once power to unit is confirmed and the unit is turned on, the screen should appear as shown below
The photo shows the off screen- The conveyors and heat are not on
- Pressing and holding the power button on the lower left side of the screen will send the unit into Preheat mode.
- Press the phone button on the lower right side to pull up the contact info for Marshall Air.
- To just turn conveyors on, double tap the power button in the lower left corner in “Off” mode.
Once unit is in “Preheating” mode it will automatically go into a 30 minute preheat to heat up. The remaining time will be displayed below the progress bar as shown in photo.
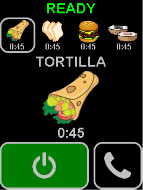
Once preheat is complete, the Ready mode screen (see below) will be displayed with the recipes along the top and a box around the active recipe. This mode is when all toasting occurs, and the unit is ready for operation.
Press the desired recipe to activate it and the unit will switch to that recipe’s settings. If there are more than four recipes, there will be arrow keys on the top to navigate between recipes
The toaster can be turned off at any time in Preheat or Ready mode by pressing and holding the power button on the lower left of the screen. This will then send the unit into a Cool Down mode for 20 minutes before fully returning to Off mode.
- Do NOT begin cleaning tasks until toaster has reached Off mode after Cool Down!! Unit will be incredibly hot and can cause injury.
DO NOT CLEAN OR TOUCH TOASTER UNTIL IT HAS BEEN TURNED OFF AND COMPLETED ITS COOL DOWN CYCLE!
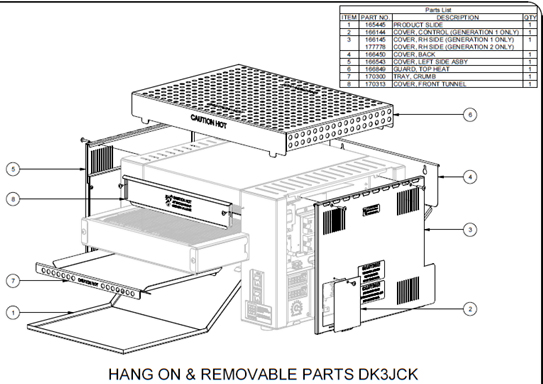
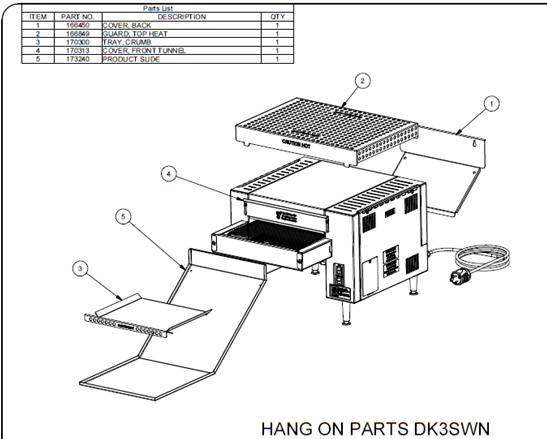
Once unit is cool enough to touch, remove all hang on parts shown in photos- take to the sink.
- Wash, rinse, and sanitize all hang on parts.
- Wipe down both sides of the unit and remove anything that may be blocking the top and bottom side vents of the unit
Menu Management
- To access the Menu Management mode on the toaster, press and hold the phone button on the lower right-hand corner of the screen.
- The Menu Management can be accessed from either the Off screen, Preheat mode screen, or Ready mode screen.
- The phone button is present in all three modes.
- In this mode recipes can be altered in a variety of ways. The name, time, temperature, and display icon can all be changed in this menu.
- In the Menu Management mode, you can have a minimum of one recipe and a maximum of nine recipes programmed.
- Once in the Menu Management screen, you can edit all the settings for each recipe.
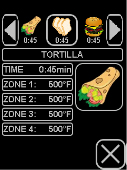
The Menu Management screen for each recipe will pop up as seen below
Use the “X” button in the lower right of the screen to exit the current screen and return to the previous screen/mode.
Click on the recipe that needs changed along the top to select it. Use the arrow keys to navigate to more recipes should there be more than four.
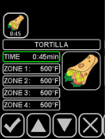
Once a recipe is selected in the Menu Management screen, the recipe editing menu is pulled up as shown below, this is where the settings are edited.
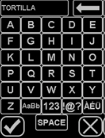
To change the name, press the name of the recipe, “Bun”, and an alphanumeric keypad will pop up as shown below. Here you can edit the name of the recipe using letters, numbers, and symbols.
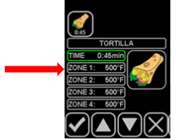
 To adjust zone temperature, press the zone temperature button below the time button. Here you can adjust the temperature using up and down arrows as shown.
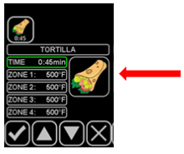
To change the icon for a recipe, press the image button on the right side of the screen, then the various food icons will pop up.
While editing settings, press the checkmark in the lower left corner of the screen to confirm changes. To cancel, press the “X” button on the lower right and no changes will be saved.
